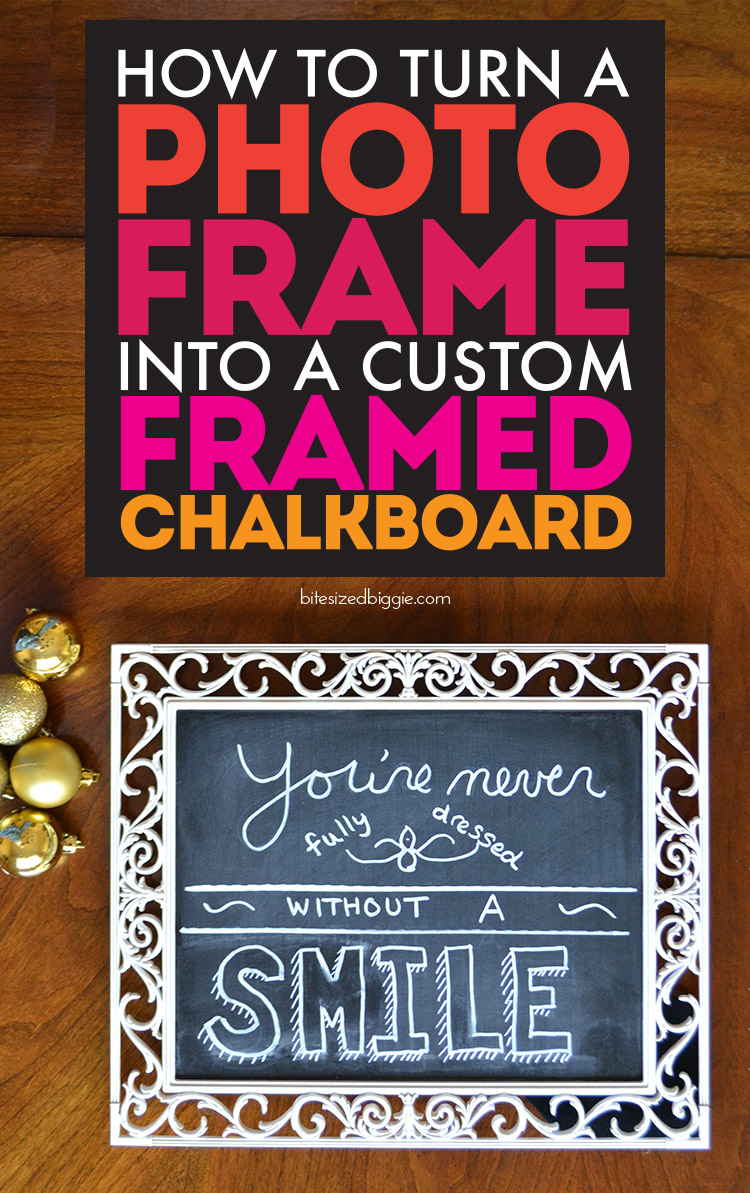
Chalkboard art is my recent obsession. I love the way it looks and the versatility to reflect changing seasons and decor makes it a must-have in every home. Just by placing a chalkboard into a stunning photo frame, and you have a coveted gift for almost everyone on your list. Since the design is drawn on the chalkboard with a washable chalk marker, the recipient can change out the message with ease over and over again!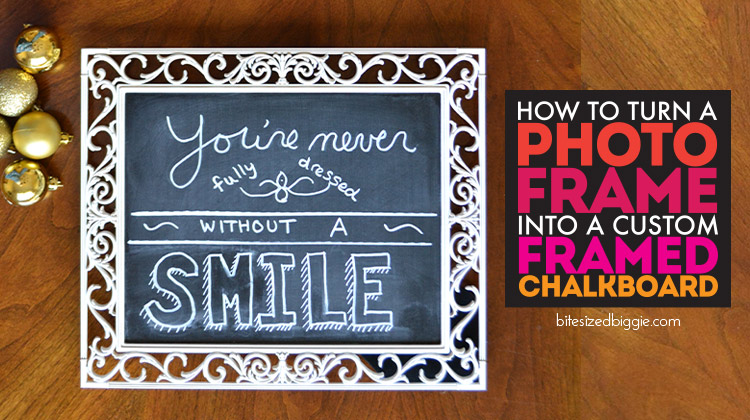
You will need just a few supplies for this project, starting with a photo frame. I opted for an 8 x 10 frame but really, you can make any size. Select a frame that will look great with the color of your chalkboard paint (the paint comes in a variety of colors!) I opted for one that compliments a traditional black chalkboard. This french inspired white metal frame caught my eye.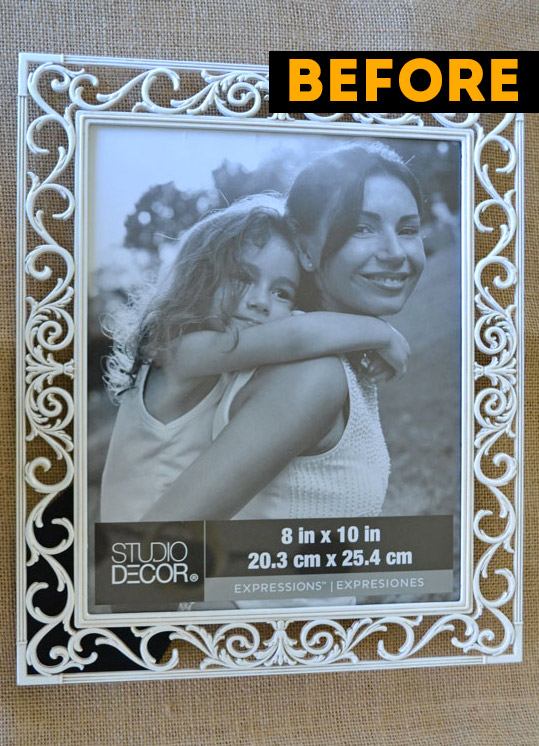
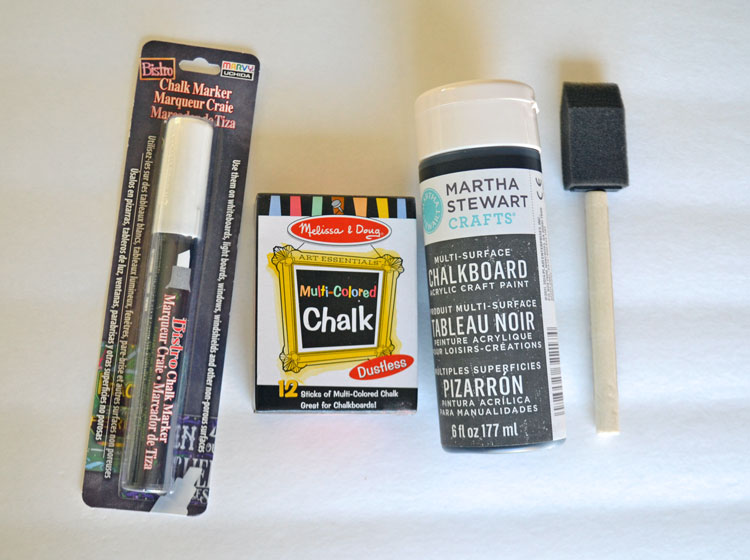
Supplies
- Chalkboard paint (affiliate)
- A chalk marker
- Paintbrush
- Regular chalk
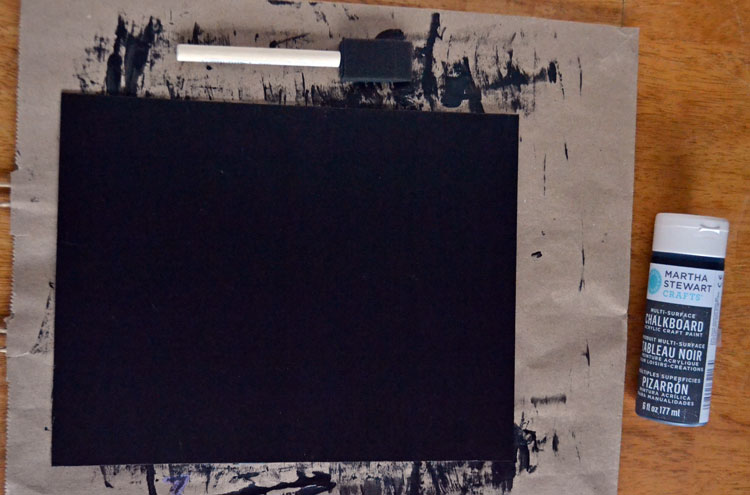
- If your frame does not include a sturdy and smooth piece of cardboard, cut one to fit the size of your frame.
Instructions
- Paint your cardboard according to the directions on your chalkboard paint. The (affiliate) Martha Stewart Multi-Surface Chalkboard Paint required two coats and a dry time of 24 hours. It was simple to use, easy to clean up and covered up the cardboard beautifully. You can also use paint to make your (affiliate) chalkboard magnetic! Simply add this step BEFORE applying the chalkboard paint.
 Once dry, place the cardboard into your frame.
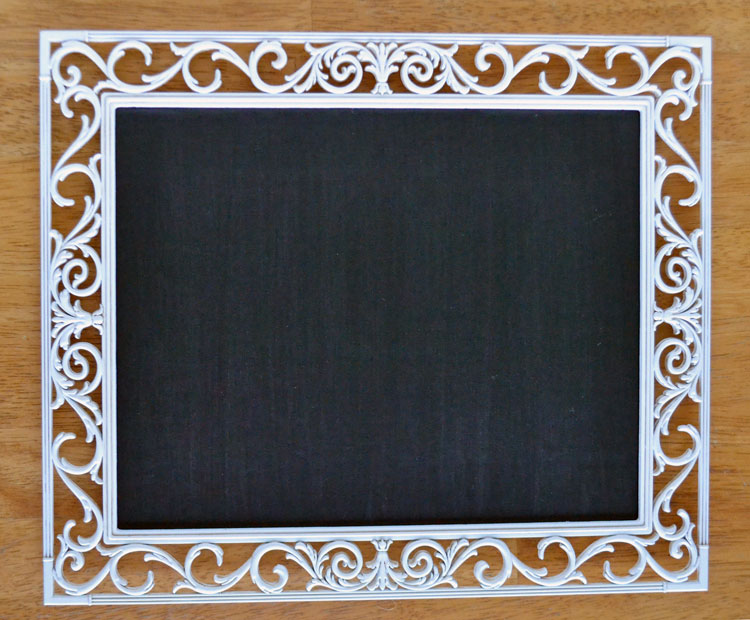 Now it’s time to let your creative juices flow. I selected a quote from one of my favorite movies. Special quotes, family mottoes, holiday sayings, or anything that speaks to you is a great place to start. Don’t forget that it can easily be erased, so don’t stress too much about the perfect text.
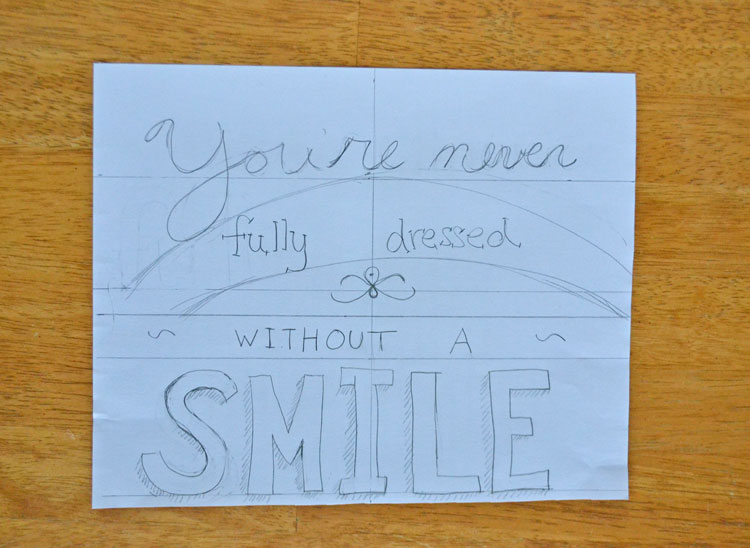
- Get funky with your font. Loads of examples are on Pinterest. I selected a few fun ones and went with it. An investment in (affiliate) The Complete Book of Chalk Lettering can be a great resource if this aspect of the project seems daunting.
- Use paper that is the same size as your chalkboard and sketch out your design in pencil.
 To get that messy chalk erased look on your chalkboard, first scribble on the chalkboard with regular chalk and wipe off with a dry paper towel.
- Redraw or transfer your design onto the chalkboard.
Here’s a simple trick to transfer your design onto the chalkboard! Tape your paper design with the front side down, up against a window. You will have the back of the paper facing you. You should clearly see your pencil design through the paper. Trace the backside of the pencil design with your regular chalk. Next, take down your paper design from the window and firmly press the design with the chalk side down, against the chalkboard. This will transfer your regular chalk design right onto the chalkboard.
Now you can use this as a guide as you start your design with the chalkboard markers. Don’t panic! If you make a mistake, the chalk can be erased. However, the chalkboard markers don’t erase as easily as regular chalk. You need to erase with a wet paper towel to remove it completely.
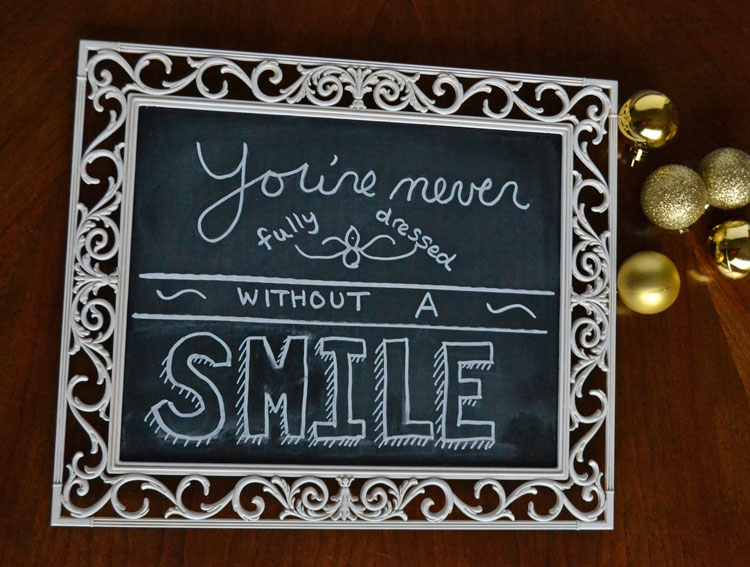
Ta Da! I love the way this elegant one came out and I’m ready to make several more this holiday season. Are you ready to make a few? Pin this Bite Sized Biggie!