
I’m always up for new activities that help make long road trips seem shorter for my kids. We drive 9 LONG hours a few times per year to visit grandparents and extended family and it’s always a struggle. I discovered that having fabric bags filled with different snacks during road trips makes for happier kids.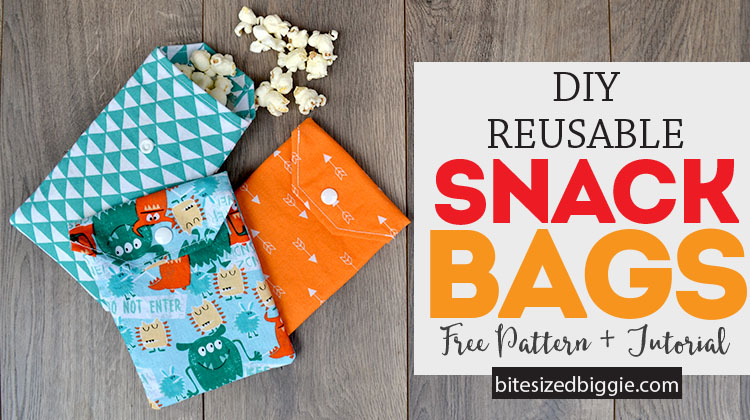
Each hour I hand off a different bag and the mystery of unwrapping this little present always creates a smile. Sometimes they contain a special treat (a few pieces of chocolate, M&Ms or cookies), but mostly they hold pretzels, baby carrots, popcorn, grapes, goldfish, graham crackers, clementine slices or apple slices. Plastic bags are fine but I know when I’m on the road or when my child is at school they are NOT getting recycled. When I have fabric bags they always get reused and I feel better about not tossing more plastic in the trash.
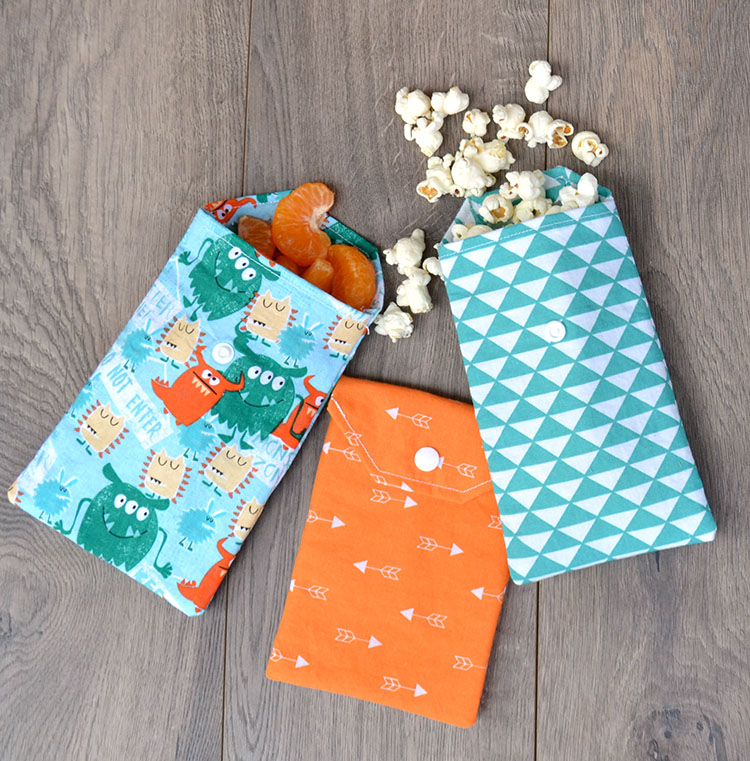 Not only are fabric snack bags fun for long car trips, you’ll love them for lunch boxes, picnics, hikes, or anytime you eat snacks on the go! These baggies have a vinyl lining so they are easy to wipe clean and they hold up in the washing machine. The plastic snap closure is a breeze to install and wont trap little annoying crumbs. Download this free pattern and whip up a half dozen or so of these baggies in NO time at all. Make these with vinyl or follow this tutorial for making food safe fabric. With these in your arsenal of travel distractions, you’ll have fewer of those “are we there yet?” moments!
Materials:
- 1/6 yard of fabric (or a fat quarter!)
- 1/6 yard of clear 4 gauge vinyl
- coordinating thread
- plastic snaps
Instructions:
- Download the FREE PATTERN. Be sure to download and open the file rather than printing it from the browser window, which can distort the printed size.
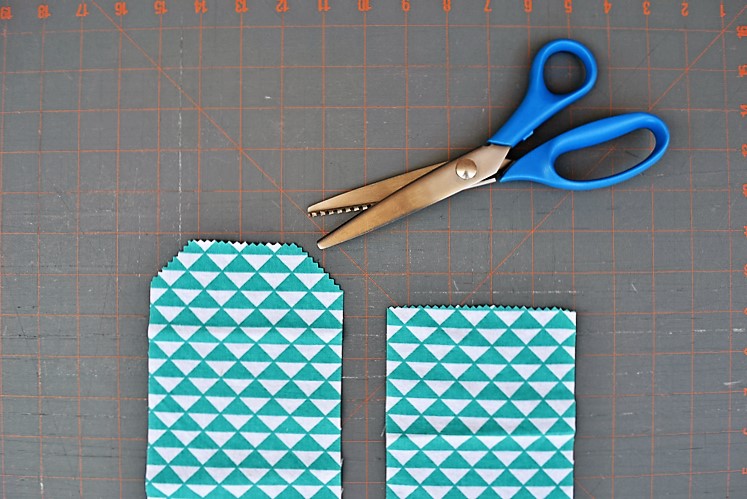
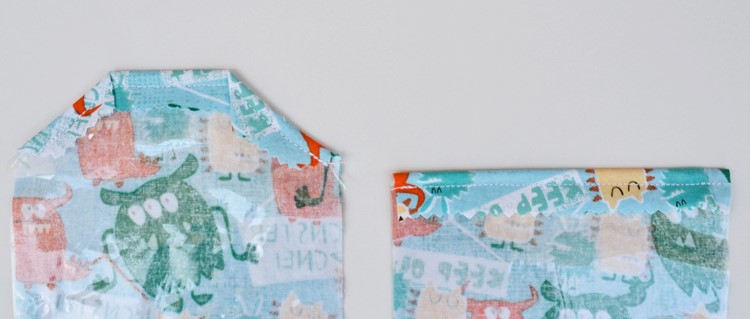
- Cut one piece of fabric and one piece of vinyl from pattern A.
- Cut one piece of fabric and one piece of vinyl from pattern B.
- Use pinking sheers to pink the fabric along the three top sides of fabric A and along the top of fabric B. These pinked edges will make the top opening of the baggie.
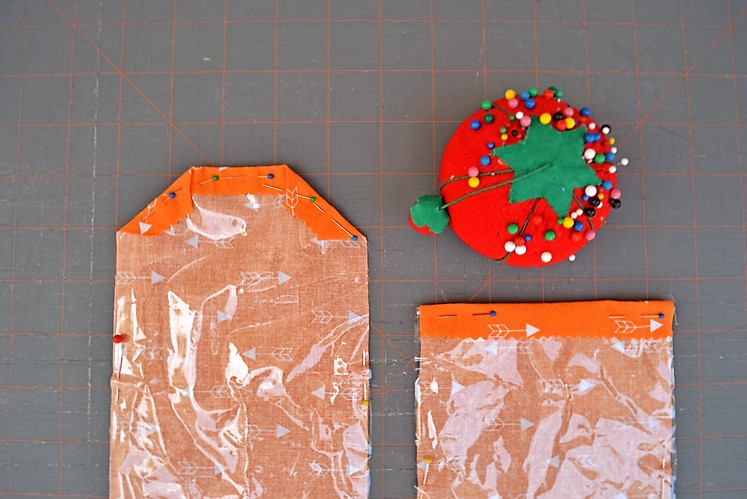
- Pin vinyl piece A to the wrong side of fabric A along the bottom and side edges. These pins will prevent your vinyl from slipping when you sew the top of the vinyl.
- Pin down vinyl piece B to the wrong side of fabric B along the bottom and side edges.
- Fold down the top pinked edge of fabric B over the vinyl by 1/2″ and pin down.
- Fold down the three top pink’ed edges of fabric A over the vinyl by 1/2″ and pin down. Fold the center section first then fold the two side edges.
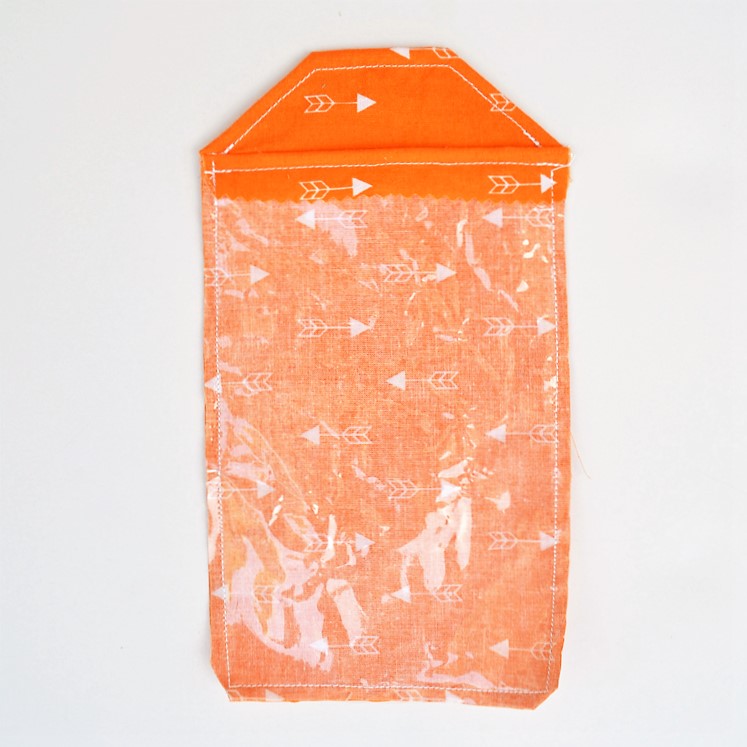
- Sew along the entire top of piece A and use 1/4″ seam allowance.
- Next, sew the top of piece B and use 1/4″ seam allowance.
- Remove all pins.
- Place the two pieces right sides together. It will appear as a sandwich with vinyl on top, fabric facing down, fabric facing up, vinyl on bottom. Pin together the sandwich on three sides without pinning the top of the baggie.
- Sew 1/4″ seam along all three sides.
- Trim the corners of excess fabric and vinyl and turn right side out.
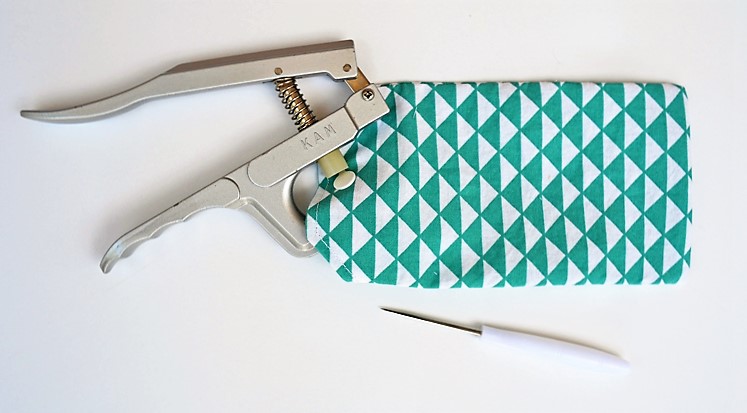
- Install your KAM snaps along the top of the snack bag. First, install the stud and cap on the flap of the baggie. It should be at the center of the baggie at 2 1/4″ from the edge and 3/4″ from the bottom of the flap. Next, install the stud and cap on the pouch. It should be at the center of the baggie at 2 1/4″ from the edge and 2″ down from the opening of the baggie. Additional installation instructions can be found here.


Once you’ve installed your snap, you’re done! Now fill it will snacks and watch your kids smile as they unwrap a yummy treat. Make these today AND share it with all of your friends. Spreading happiness AND reducing your waste has never been so easy. Pin this to save it for later!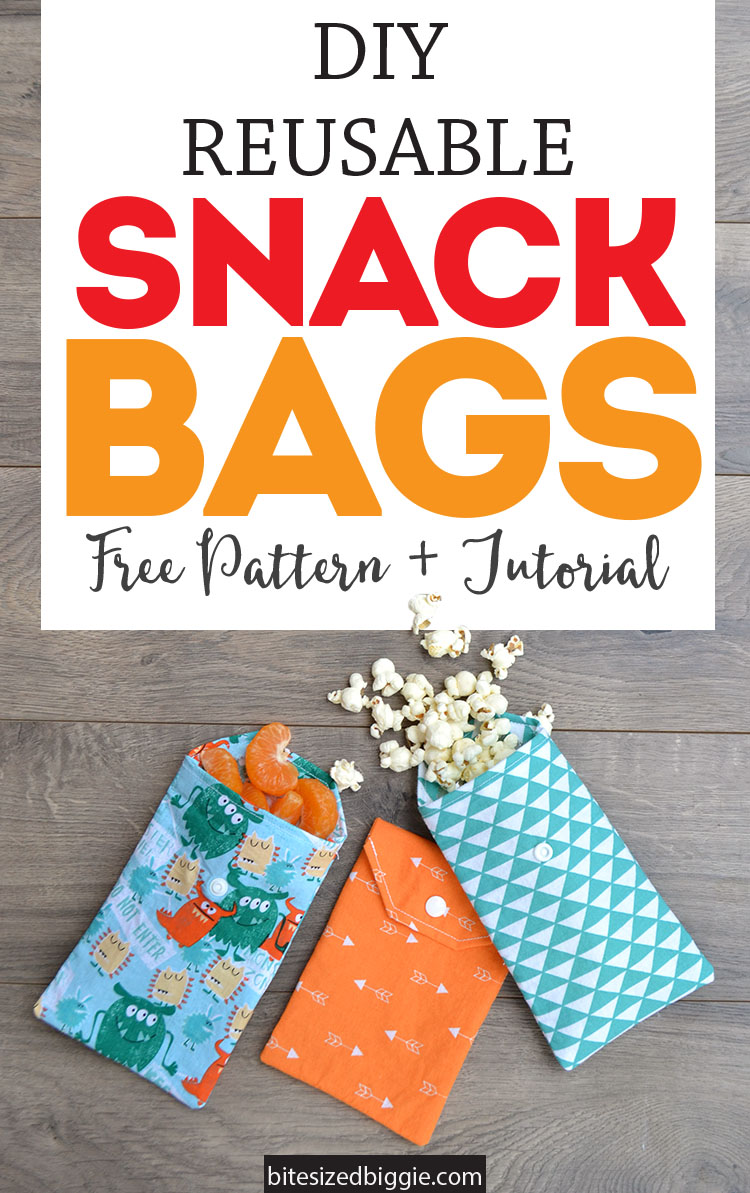
Save

One Comment
Leave a Reply